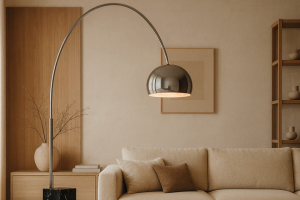

Thinking of brightening up your yard or patio? A double-headed adjustable pillar light can be a fantastic, versatile solution. These aren’t just for looking pretty – they offer practical illumination that you can direct exactly where you need it, making your outdoor areas safer, more functional, and more inviting after dark.
Let’s cut to the chase: these lights offer flexibility that single-head models simply can’t. Imagine being able to highlight Top5lamp your prize-winning rose bush and illuminate the pathway leading to your back door with a single fixture. That’s the core appeal.
Targeted Illumination
Unlike a fixed floodlight or a basic lantern that throws light in all directions, an adjustable pillar light allows you to direct its beams consciously. This is crucial for:
- Highlighting Features: Pinpoint that beautiful sculpture, a decorative bench, or a specific planting. You’re not just generally lighting an area; you’re creating focal points.
- Path and Walkway Safety: Aim one light down the path to ensure clear visibility for evening strolls, reducing trip hazards.
- Security: Direct light towards entry points or darker corners of your garden, deterring potential intruders. A well-lit space is often a safer space.
- Task Lighting: If you have an outdoor kitchen or a seating area where you might read or play games, you can angle one head to provide focused light without disturbing the general ambiance of the rest of the space.
Enhanced Versatility and Control
The “double-headed” and “adjustable” aspects truly make these lights stand out.
- Two Lights, One Fixture: You get two independent light sources from a single installation point. This simplifies wiring compared to installing two separate fixtures, potentially saving you time and money on electricians.
- Independent Directional Control: Each head usually pivots and tilts, allowing you to aim them in completely different directions. This means you could, for instance, point one head towards your house number for visibility and the other towards your flowerbed.
- Beam Spread Options: Some models even let you adjust the beam spread from a narrow spotlight to a wider floodlight, offering even more control over how the light interacts with your space.
Aesthetic Appeal and Design Integration
Beyond their practical uses, these lights can significantly boost your outdoor decor.
- Modern and Clean Look: Many designs feature sleek lines and contemporary finishes that complement modern architectural styles.
- Architectural Accents: The lights themselves can become a design element, drawing the eye and adding structure to your landscaping.
- Creating Ambiance: By directing light onto textures (like a stone wall or a tree trunk) or through foliage, you can create interesting shadows and layers, adding depth and a welcoming atmosphere to your garden or patio.
- Variety of Styles: While often modern, you can find these lights in various materials and finishes, from brushed stainless steel to weathered bronze, allowing them to blend seamlessly with your existing outdoor aesthetic.
Where to Install Your Adjustable Pillar Light
Location is key to maximizing the benefits of these lights. Think about both functionality and aesthetics.
Entryways and Pathways
This is perhaps the most common and practical placement.
- Front Door Illumination: Place a pillar light near your main entrance. One head can illuminate the door area, making it easier to unlock and welcome guests, while the other can light up steps or planters nearby.
- Garden Paths: Spaced along a meandering garden path, these lights can create a magical nighttime route, guiding visitors and highlighting the path’s contours. Aim one head forward along the path and the other inwards towards planting beds.
- Driveway Edges: If you have a longer driveway, pillar lights can mark its edges, improving visibility for vehicles and pedestrians, especially if you set them back slightly into the landscape.
Patios, Decks, and Seating Areas
Extend your living space into the evening with proper lighting.
- Defining Zones: Use pillar lights to subtly define different zones on a larger patio. One head might illuminate a dining table, while the other points towards a lounge area.
- Grilling Stations: If you have an outdoor kitchen or grilling spot, an adjustable pillar light can provide much-needed task lighting exactly where you’re preparing food, ensuring safety and precision.
- Seating Nooks: Place a light strategically next to an outdoor sofa or a pair of chairs. One head could offer general ambient light, and the second could provide a reading light if needed.
Garden Features and Landscaping
Showcase your hard work even after sunset.
- Highlighting Trees and Shrubs: Position a pillar light at the base of an interesting tree or a meticulously pruned shrub. Angle one head upwards to highlight its form and texture.
- Water Features: A well-placed pillar light can dramatically enhance a pond, fountain, or waterfall. The light reflecting off the water creates a dynamic and captivating effect.
- Architectural Elements: If you have a decorative wall, a pergola post, or a garden arch, a pillar light can draw attention to these structures, adding depth to your landscape design.
- Sculptures and Art: Precisely light your outdoor artwork. The adjustable heads allow you to avoid glare and highlight the piece from the most flattering angles.
Key Features to Look For
Not all double-headed adjustable pillar lights are created equal. Knowing what features matter will help you make a smart choice.
Material and Durability
Outdoor fixtures endure a lot.
- Corrosion Resistance: Look for materials like marine-grade stainless steel, powder-coated aluminum, or high-grade brass. These materials withstand rain, humidity, and temperature fluctuations without rusting or degrading quickly.
- IP Rating: This stands for “Ingress Protection” and tells you how well the fixture is sealed against dust and water. For outdoor use, an IP44 rating is generally the minimum for splash protection, but an IP65 or IP66 offers better protection against jets of water and dust, ideal for exposed areas.
- UV Resistance: If plastic components are used, ensure they are UV-stabilized to prevent brittleness and discoloration from sun exposure over time.
- Thermal Management: Good quality lights will have design features that dissipate heat effectively, which is important for the lifespan of LED bulbs, especially in enclosed fixtures.
Adjustability and Light Output
These are core to the light’s functionality.
- Swivel and Tilt Range: Check how much each head can pivot and tilt. The more range, the more flexibility you’ll have in directing the light. Some offer nearly 360-degree rotation, while others are more limited.
- Lamp Type (LED is Best): Modern outdoor lights almost exclusively use LED. They are energy-efficient, long-lasting, and offer various light colors (color temperatures).
- Brightness (Lumens): Don’t just look at wattage; look at lumens. This measures the actual light output. For general pathway lighting, 100-300 lumens per head might be sufficient, while for accenting a large tree, you might want 500-800 lumens or more per head.
- Color Temperature (Kelvin): This affects the mood.
- Warm White (2700K-3000K): Creates a cozy, inviting atmosphere, similar to traditional incandescent bulbs. Good for patios and seating areas.
- Neutral White (3500K-4000K): Brighter and more energetic, good for task lighting or security.
- Cool White (5000K-6500K): Very bright, almost bluish light, often used for security or commercial applications, but can feel stark in a residential setting.
Installation and Wiring Considerations
Even if you’re not doing the wiring yourself, it’s good to understand the basics.
- Voltage: Most outdoor lights are 120V (standard household voltage) or 12V (low voltage).
- 120V: Brighter lights, less voltage drop over long distances, but requires professional installation (or a permitted DIYer) as it handles high voltage.
- 12V: Safer to install yourself, ideal for smaller lighting schemes, but requires a transformer to step down voltage and light output can diminish over very long wire runs.
- Base Type: How will it connect to the ground? Some come with a sturdy base plate for mounting on concrete or decking, while others might have a stake for inserting into soil.
- Wiring Access: Ensure the fixture has a well-designed compartment for making electrical connections that keeps them dry and secure.
- Dimming Compatibility: If you want to adjust the light intensity, ensure the fixture and its integrated LEDs (or chosen bulbs) are compatible with outdoor dimmers.
Smart Features (Optional but Nice)
For those who love smart home tech.
- Dusk-to-Dawn Sensor: Automatically turns the lights on at dusk and off at dawn.
- Motion Sensor: Activates lights when movement is detected, great for security or late-night arrivals.
- Smart Home Integration: Some lights can connect to Wi-Fi or Bluetooth, allowing control via a smartphone app, scheduling, and integration with systems like Alexa or Google Home. You might be able to change colors, dim, and set schedules remotely.
Installation Tips (General Guidance, Not DIY Instructions)
While every fixture and installation site is different, some common-sense approaches apply. Always consult with a qualified electrician for 120V installations or if you’re unsure about low-voltage wiring.
Planning Your Layout
Don’t just randomly place your lights.
- Sketch it Out: Draw a simple map of your outdoor space. Mark existing features, pathways, and seating areas. Plan where you want light and what you want to illuminate.
- Test with a Flashlight: Go out at night with a powerful flashlight and mimic where you think the lights will go. This gives you a surprisingly good idea of how the light will fall and what unintended shadows might be created.
- Consider Neighborly Etiquette: Aim your lights downwards or inwards, away from neighbors’ windows and property, to avoid light pollution and glare. Nobody wants a bright light shining into their bedroom.
- Think About Power Access: How will you get power to each light? This often dictates placement or requires more extensive trenching for wiring.
Ground Preparation
A stable foundation is crucial for pillar lights.
- Level Surface: If mounting on a patio or deck, ensure the surface is flat and can support the light’s weight.
- Concrete Pad for Soil: For lights being installed in soil, a small, level concrete pad (even a pre-cast paver) can provide a much more stable base than just burying a stake. This prevents the light from tilting over time due to ground settling or strong winds.
- Drainage: Consider drainage around the base of the light to prevent water accumulation, especially important for electrical connections.
Wiring Safely
This is where a professional often comes in.
- Underground Cable: For 120V installations, use direct burial cable (rated UF, or “Underground Feeder”) run in appropriate conduit and buried at the correct depth according to local electrical codes.
- Low Voltage Wiring: While easier, ensure you use outdoor-rated low-voltage cable and make watertight connections. Overloading a transformer is a common mistake, so calculate your total wattage carefully.
- GFCI Protection: All outdoor electrical outlets and circuits should be protected by Ground Fault Circuit Interrupters (GFCIs) to prevent electrical shock. This is a non-negotiable safety measure.
- Watertight Connections: All wire splices and connections must be made using waterproof connectors and junction boxes to prevent moisture from entering and causing shorts or corrosion.
Aiming and Adjusting
The beauty of the adjustable feature!
- Evening Adjustment: The best time to fine-tune your light angles is after dark. You can see the effects of your adjustments immediately.
- Avoid Glare: Angle the lights so that the actual light source isn’t directly visible to people standing or sitting in your primary viewing areas. You want to see the effect of the light, not the bulb itself.
- Play with Shadows: Don’t be afraid of shadows. Strategic shadows can add drama and texture to your landscape. Try aiming a light through foliage to create interesting dappled patterns.
- Symmetry vs. Asymmetry: Depending on your design, you might aim the two heads symmetrically (e.g., both pointing forward down a path) or asymmetrically (one on the path, one highlighting a bush). Experiment to see what looks best.
Maintenance and Longevity
A little care goes a long way in ensuring your lights last and perform optimally.
Regular Cleaning
Dirt and grime build up quickly outdoors.
- Wipe Down Fixtures: Periodically clean the exterior of the light fixtures with a soft, damp cloth to remove dust, dirt, and water spots. This keeps them looking new and prevents build-up that could affect light output or material integrity.
- Clean Lenses: Keep the glass or plastic lenses clear of debris, spiderwebs, and leaves. Even a thin layer of grime can significantly reduce light output and create uneven illumination.
- Avoid Harsh Chemicals: Use mild soap and water. Harsh chemical cleaners can damage finishes or plastic components.
Checking Electrical Connections
Prevention is better than cure.
- Inspect Wiring: Occasionally check visible wiring for any damage from pests (like rodents chewing insulation), weathering, or accidental nicks.
- Tighten Connections: Over time, screws and connections can loosen due to temperature changes or vibrations. Briefly check and tighten any accessible screws, especially on mounting plates or wire compartments (ensure power is off first!).
- Water Ingress: Look for any signs of water inside the fixture’s wiring compartment. If found, this needs immediate attention to prevent electrical issues.
Bulb Replacement (if applicable)
While integrated LEDs last a long time, sometimes parts fail.
- LED Lifespan: Integrated LEDs are designed to last tens of thousands of hours (e.g., 50,000 hours, which is over 10 years of average daily use). If one fails prematurely, it might be a defect or an electrical issue.
- Replace with Correct Bulb: If your fixture uses replaceable bulbs (less common with highly integrated LED designs), always replace them with the correct type, wattage, and voltage to avoid damage or fire hazards.
- Seal Properly: When replacing bulbs, ensure any gaskets or seals are properly seated to maintain the fixture’s IP rating against water ingress.
Seasonal Adjustments
Take advantage of the adjustability!
- Foliage Growth: As plants grow and change throughout the seasons, you might need to re-angle your lights to maintain desired illumination and prevent light from being blocked.
- Winter Considerations: In areas with heavy snow, you might need to raise or adjust lights to avoid them being buried or damaged by snow removal.
- Event Lighting: If you’re hosting an outdoor event, you can temporarily re-angle the lights to focus on specific areas or create a different atmosphere for the occasion.
By thoughtfully planning and installing a double-headed adjustable pillar light, you’ll not only enhance the beauty of your outdoor space but also improve its functionality, safety, and overall enjoyment for years to come.